Eltako FSU14 (30014015)
Installation > Home Automation > EIB material
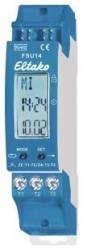
Eltako FSU14 (30014015)
| Lieske Part No. | 688220 |
|---|---|
| Mfg Part No | 30014015 |
| EAN-Code | 4010312313831 |
| Manufacturer | Eltako |
| Here only | 67,16 EUR
79,92 EUR incl. VAT
|
Further information for Eltako FSU14 (30014015)
Display timer with 8 channels for the Eltako RS485 bus. With astro function. Standby loss only 0.1 watts. Modular device for mounting on a mounting rail. Connection to the Eltako RS485 bus, cross-wiring of the bus and power supply with jumper. For the FSU14 timer to work, a device address must be assigned by the FAM14 radio antenna module, as described in the operating instructions. The switching commands of the channels can be taught into bus actuators and radio actuators. Up to 60 timer memory locations are freely distributed across the channels. With date and automatic summer/winter time changeover. Power reserve without battery approx. 20 days. Each memory location can be assigned either the astro function (automatic switching after sunrise or sunset) or the time function. The astro switch-on or switch-off time can be shifted by ± 2 hours. In addition, a time shift of up to ± 2 hours influenced by the solstices can be entered. The time switch is set using the MODE and SET buttons and the settings can be locked. Setting the language: Each time the supply voltage is applied, the language can be selected within 10 seconds using SET and confirmed with MODE. D = German, GB = English, F = French, IT = Italian and ES = Spanish. The normal display then appears: day of the week, time, day and month. Fast forward: For the following settings, the numbers increase quickly if the Enter button is pressed and held down. Releasing and pressing again for a longer time changes the direction. Setting the time: Press MODE and use SET to find the CLOCK function and select it with MODE. For S, use SET to select the hour and confirm with MODE. Do the same for M for minute. Setting the date: Press MODE and use SET to find the DAT function and select it with MODE. For J, use SET to select the year and confirm with MODE. Do the same for M for month and T for day. The last setting in the sequence is MO (day of the week). This can be set with SET. The FSU14 sends a clock telegram every minute with the time (hour and minute) and the day of the week. From production week 15/15, radio buttons for central on/off, automatic off and random mode on can be taught in. Setting position coordinates (if the astro function is required): Press MODE and use SET to search for the POS function and select it with MODE. For BRT, use SET to select the latitude and press MODE to confirm. Likewise, for LAE, select the longitude and press MODE to confirm. Now for GMT, use SET to select the time zone and press MODE to confirm. If required, a time shift of up to ± 2 hours can now be entered for all channels together for WSW (winter solstice) and SSW (summer solstice). Summer/winter time change: Press MODE and use SET to search for the SWZ function and select it with MODE.Now you can use SET to switch between ON and OFF. If ON was selected, the switchover takes place automatically. Lock settings: briefly press MODE and SET together and lock with SET for LCK. This is indicated by an arrow next to the lock symbol. Unlock settings: press MODE and SET together for 2 seconds and unlock with SET for UNL. Wired central control: Switches for central control can be connected to terminals T1/T2 and T3/T2. Set operating mode: press MODE and use SET to search for the INT function and select it with MODE. For KNL, use SET to select the channel and confirm with MODE. SET can be used to switch between ZEA (automatic with central control), AUT (automatic), ON (with priority) or OFF (with priority). If ON or OFF is confirmed with MODE, the corresponding telegram is sent immediately. If the switching state is to change automatically again when a time program is activated, the channel must be set back to ZEA or AUT. If M

This is an offer of:
79279 Vörstetten
https://industry-electronics.com
Tel. 07666/88499-0
Fax. 07666/88499-111
Diesen Artikel finden Sie unter:
industry-electronics.com/artikel/688220

Lieske Elektronik e.K.
Reutener Str. 1079279 Vörstetten
https://industry-electronics.com
Tel. 07666/88499-0
Fax. 07666/88499-111
Diesen Artikel finden Sie unter:
industry-electronics.com/artikel/688220